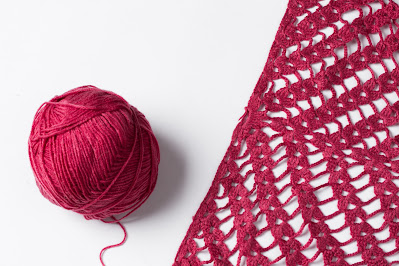
Guide to Measure Gauge Over Lace Patterns
Gauge is the secret to many successful knitting projects. It is a measurement of your stitches. Before starting any project, you must make a swatch with the suggested knitting needles and yarn. While many advanced knitters forego gauge for a few knitting projects, a beginner must only set out on this adventure with measuring gauge.
Measuring gauge over stockinette and other stitch patterns is simple but challenging for lace. Lace involves a fabric with artful holes, making it difficult to count the stitches required for a gauge. Check out this blog to simplify things and help you measure gauge over lace. We'll guide you through the steps to accurately measure gauge in lace knitting.
Measuring gauge in lace knitting patterns requires a slightly different approach than in other stitch patterns. Here's a step-by-step guide to help you accurately measure gauge in lace knitting:
Create a Swatch: To create a swatch, choose the knitting needles mentioned in the pattern (if you are following one). If you experiment with lace knitting, you need knitting needle sizes bigger than the suitable yarn weight. The secret to lace knitting is choosing comfortable tools and yarn. Circular knitting needles are the right choice, as their ergonomic design is easy on the hands while working on all kinds of projects—flat as well as in the round.
Begin by casting on more stitches than the pattern calls for to ensure you have enough to measure accurately. Knit a swatch that's at least 4 inches by 4 inches (10 cm by 10 cm). Include a few rows of garter stitch or seed stitch at the edges of your swatch to prevent it from curling.
Block Your Swatch: Lace knitting often requires blocking to open up the lace pattern and reveal its full beauty. Wet blocking or steam blocking your swatch will help relax the stitches and make it easier to measure the gauge accurately.
Identify Pattern Repeats: Lace patterns typically have repeats that consist of a certain number of stitches repeated across the row. Count the number of stitches in one complete repeat of the lace pattern to help you determine your gauge.
Measure Across the Swatch: Lay your swatch flat on a surface and use a ruler or tape measure to measure the number of stitches across 4 inches (10 cm) in the center of the swatch. Be sure to avoid stretching or compressing the swatch as you measure.
Count Rows: Next, measure the number of rows vertically in 4 inches (10 cm). Count the rows from the center of the swatch to get an accurate measurement.
Calculate Gauge: Divide the number of stitches across by 4 to determine your stitches per inch (or stitches per 10 cm). Similarly, divide the number of rows by 4 to find your rows per inch (or rows per 10 cm). This will give you the gauge for your lace pattern.
Compare to Pattern Gauge: Lace patterns often include gauge information to help you ensure your finished project will be the correct size. Compare your gauge swatch measurements to the gauge specified in the pattern. If your gauge differs from the pattern gauge, you may need to adjust your needle size and tension to achieve the correct gauge.
Make Adjustments: If your gauge doesn't match the pattern gauge, try using a different needle size or adjusting your tension until you achieve the correct gauge.
Matching gauge is essential in lace knitting to ensure your finished project turns out the right size. Most importantly, the gauge is forgiving in lace knitting patterns, mainly if used for shawls, scarves, stoles, etc., where fit is optional. By following these steps and measuring gauge accurately, you'll successfully knit lace patterns and create stunning projects.


Comments
Post a Comment