Learn to Knit Sock

Knitting socks is a great project for a new
knitter because it's practical, easier, fun to make, and can be done at almost
any time. Knitting socks is not just a craft; it's an art that brings warmth,
comfort, and a personal touch to your everyday wear. You can use double-pointed
knitting needles (DPNs) or circular knitting needles to knit
socks. Both options work well; the choice often depends on personal preference.
They can be made in any size and for any event!
This blog is created not only to facilitate
learning but also to guide you through the art of crafting socks. We've weaved
a fundamental ribbed socks pattern for kids, enabling you to master the
essential techniques. Organize the supplies listed below, and let's begin an
enriching educational journey together.
Ribbed Socks Pattern For Kids
Supplies We Need:
●
Knitting Needles:
You can choose circular knitting needles, but we have used double-pointed
knitting needles to create this design. Also, consider the material. We prefer wooden
knitting needles for chilly winters because of their warm nature.
●
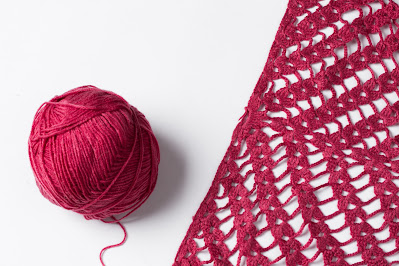
Yarn: Fingering, lace-weight or sock-weight
yarn
●
Accessories: Stitch markers,
measuring tool for keeping a count of the stitches and desired length.
●
Tapestry Needle: For weaving the ends.
Abbreviations:
sts: Stitches
s1: Slip one stitch
k: Knit
p: Purl
p2tog: Purl two stitches together
k2tog: Knit two stitches together
Rnd: Round
rep: repeat
ssk: Slip, slip, knit (slip two stitches individually knitwise, then knit
them together through the back loops)
inches: in. (unit of measurement)
Note:
●
You are free to add more inches on
the cuff.
●
Circular knitting needles can
replace multiple double-pointed needles in sock-making by facilitating seamless
knitting in the round, offering efficient stitch distribution, and providing
comfort and versatility with various cable lengths.
Heel Flap:
Divide the stitches as follows:
●
Needle 1: 24 sts
●
Needles 2 and 3: 12 sts each
●
For the heel flap, only work back
and forth on Needle 1 in the following manner:
●
Row 1: (s1, k1) Repeat to the end of the row.
●
Row 2: s1, p to the end of the row. Repeat
rows 1 and 2 twelve times. Repeat row 1 one more time. You will have columns of
13 slipped stitches on the heel flap.
Turn the Heel:
Continue working on needle 1 only as follows:
●
Row 1: s1, p13, p2tog, p1, turn.
●
Row 2: s1, k5, k2tog, k1, turn.
●
Row 3: S1, p to 1 st before the gap, p2tog,
p1, turn.
●
Row 4: s1, k to 1 st before the gap, k2tog,
k1, turn. Rows 3 and 4 should be repeated until all the stitches are worked. On
the last 2 rows of the repeat, you will end with a p2tog and a k2tog. End with
a row 4. (14 sts remain)
Gusset:
Continue with the working yarn, and with the
free double-pointed or circular knitting needle, pick up 15 stitches (one
stitch in each slipped stitch) down the side of the heel flap. Place the
stitches from needle 3 onto needle 2 (24 sts are on needle 2). This is the top
of the sock now.
Work across in the rib pattern (k3, p1).
Continue with the working yarn, and with the
free needle, pick up 15 stitches up the other side of the heel flap (one stitch
in each slipped stitch). Knit across 7 stitches from the heel turn. Place the
remaining 7 stitches on the next needle.
The new stitch arrangement is as follows:
●
Needle 1: 22 stitches
●
Needle 2: 24 stitches (rib pattern)
●
Needle 3: 22 stitches
Continue working on the gusset as follows:
●
Rnd 1: knit
●
Rnd 2:
Needle 1: k to last 3 stitches,
k2tog, k1
Needle 2: (k3, p1) You need to
repeat to the end of the needle
●
Needle 3: k1, k2tog, k to the end of the
needle
●
Repeat rounds 1 and 2 until 12
stitches remain on needles 1 and 3.
Foot:
Continue by knitting the stitches on needles 1
and 3 and working in the rib pattern across needle 2 until the foot measures 1½
‐inches shorter than the desired finished length of the sock. Measure from the
back of the heel to the stitches on the needles.
Toe:
●
Rnd 1: knit
●
Rnd 2:
Needle 1: k to last 3 sts,
k2tog, k1
Needle 2: k1, ssk, k to last 3
sts, k2tog, k1
Needle 3: k1, ssk, k to end of
the needle
●
Repeat rounds 1 and 2 until the
following stitches remain:
●
Needles 1 and 2: 6 sts
●
Needle 3: 12 sts
Closing the Toe:
●
Knit the stitches from needle 3
onto needle 1. (12 sts on each of 2 Double pointed knitting needles)
●
Cut the yarn, leaving an 8‐inch
end.
●
Place the end on a yarn needle.
●
Graft the toe closed using the Kitchener
stitch.
Voila! Your sock is ready.
Congratulations on creating this charming baby
sock with such ease! As you continue practicing and perfecting these basic
stitches, a world of diverse designs and knitting patterns eagerly awaits your
exploration. Keep knitting and discovering!


Comments
Post a Comment