How to Knit the I-Cord Bind Off
 |
If you're just beginning your knitting journey, chances are you're only acquainted with the traditional bind-off method. However, a delightful surprise awaits you – the "I-Cord Bind Off." Regardless of the type of knitting needle you prefer, be it the classic wooden knitting needles or any other, this technique adds uniqueness to your projects. Are you ready to add some serious pizzazz to your knitting? So, let's quench your curiosity and explore this technique.
What is I-Cord Bind Off?
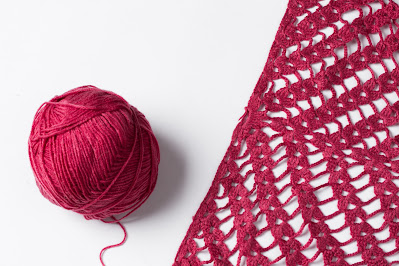
Knitters can utilize the I-Cord Bind-Off technique to achieve a polished, rounded edge on a completed project. "I-Cord" is an abbreviation for "applied I-cord" or "applied edging," which knits a tiny, tube-like structure all the way around the edge of your piece with single pointed knitting needles to circulars. This method is especially well-liked for completing the edges of blankets, shawls, and other items where a polished, neat appearance is preferred.
How to do I-Cord Bind-Off?
Materials Needed:
Knitting needles: You have a wide choice, from single to circular knitting needles. Ensure they are the same size you used for the main project.
Yarn: Use the same yarn as your project or a complementary color.
Scissors: For cutting the yarn at the end.
Step-by-Step Guide to the I-Cord Bind-Off:
Step 1: Knit the First Two Stitches
Start with the first two stitches on your left-hand needle. Knit them as you normally would, inserting the right-hand needle into the front loops of the stitches and wrapping the yarn around.
Step 2: Create the I-Cord
After knitting the two stitches, don't turn your work. Instead, slide the stitches to the right end of the needle without turning them. The yarn should be at the left end of the stitches, forming a small tube (the I-Cord).
Step 3: Knit the Next Stitch
Bring the yarn behind the work to the right-hand side and knit the next stitch on the left-hand needle.
Step 4: Slide Stitches and Repeat
Just like in Step 2, slide the stitches to the right end of the needle without turning. This will create a new I-Cord. Repeat this process, knitting one stitch and sliding the stitches until you have bound off the desired number of stitches.
Step 5: Finishing
Cut the yarn when you reach the last stitch, leaving a few inches of tail. Thread the tail through the last stitch, pull it tight, and secure it with a knot. Weave in any remaining ends.
Exploring Knitting Finesse: A Guide to Various Bind-Off Techniques
There are various bind-off techniques in knitting, each offering a unique finish to your projects. Here are some commonly used bind-off methods:
Basic Bind Off:
- Knit the first two stitches.
- Pass the first stitch over the second stitch and off the needle.
- Knit the next stitch.
- Repeat until one stitch remains, then cut the yarn and pull it through the last stitch.
Jeny's Surprisingly Stretchy Bind-Off (JSSBO):
- A stretchy bind-off technique that involves yarnovers and knitting through the back loop, providing elasticity to the edge.
- Choose the bind-off method that best suits the project's requirements, considering factors like stretchiness, decorative elements, and the overall aesthetic you wish to achieve
Stretchy Bind Off:
- This is great for projects like socks or cuffs where extra stretch is needed.
- Use a larger needle or a stretchy bind-off method, like the "Jeny's Surprisingly Stretchy Bind-Off (JSSBO)," which involves yarnovers and knitting through the back loop.
Lace Bind Off:
- Ideal for lace projects, this bind-off keeps the edge loose and complements lace patterns.
- It often involves yarnovers and decreases to maintain the openness of the lace.
Picot Bind Off:
- It creates a decorative edge with small loops.
- Generally, it involves binding off a small number of stitches and then casting on an equal number of stitches using a backward loop or knitted cast-on.
Three-Needle Bind Off:
- It involves binding off stitches by using a third needle, be it your double pointed knitting needle or a straight one, to knit two stitches together.
- It is useful for joining two pieces together, like shoulder seams.
Russian Bind Off:
- A stretchy bind-off method involves knitting two stitches together through the back loop and passing the resulting stitch back onto the left-hand needle.
Regardless of your technique, always observe your tension to ensure an even and smooth Binding Off. For an adorning touch, consider using a contrasting color for the I-Cord. If you're new to the I-Cord Bind-Off, practice on a small swatch before incorporating it into a larger project. This way, you will protect your project from unraveling or falling stitches.


Comments
Post a Comment