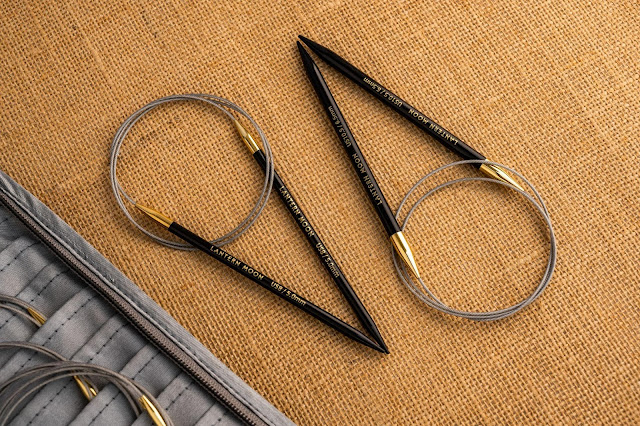
Knitting Socks with Circular Needles
Knitting a pair of socks is so much fun. Hand-knit socks are pure love for yourself or any loved one. The socks grow quickly on your knitting needles and even with a crochet hooks. You put your stash to good use in making a colorful pair of socks. There are thousands of great patterns on the web for hand-knitted socks but if you do not want to spend time browsing, you can easily make a pair on your own. Knitting socks with circular needles is perfect. The needles are designed for comfortable knitting in the round. You simply knit in rounds without having to worry about seaming the edges. So, let’s get started.
Knitting Socks on Circular Knitting Needles
To make socks on circular knitting needles there are many options. You could go ahead with any of the three methods below. It is also recommended that you keep a set of double-pointed knitting needles as you may need to switch the needle to knit with very few stitches. A sock pattern is the best way to start, even if you are a beginner.
-
Knit with One Circular Needle
This one is the most comfortable to knit socks but the only condition is that you find the cord length that does not stretch the stitches. Start by casting stitches on one needle tip. Spread them over the cord and to the other needle tip. Join the round and knit till you have achieved the length.
-
Knitting with Two Circular Needles
Advanced knitters love this method but even if you are a beginner you can give it a try. With two circular needles you can easily knit socks, sometimes even two at a time. The only rule is that the needles should be of similar size and length.
-
Magic Loop Technique
You need only one circular knitting needle to knit socks with the magic loop technique. The needle length or mostly the cord length must be somewhere between 32 inches to 47 inches. The cord must be smooth and must bend to accommodate stitches on the needle tips with enough length to go in and out of stitches.
So, let’s get started with knitting socks with circular knitting needles.
For your sock sizes, here’s a quick chart.
|
(U.S. Shoe Sizes) |
4-6½ |
6-8½ |
7-9½ |
9-11½ |
10-12½ |
13 -14 |
|
Foot Circumference (inches) |
7 |
8 |
8 |
9 |
9 |
10 |
|
Sock Height |
6½ |
7½ |
7 |
8 |
7½ |
8½ |
|
Total Foot Length |
8 |
9¼-10 |
9¼-10 |
10¼-11 |
10¼-11 |
11¼-12 |
Socks are knit in two ways - cuff down or toe up. You will easily find knitters divided over this discussion. Many prefer to begin with the cuff as it gives the flexibility of experimenting with the length and trying the project when it's on the knitting needles. Whether you knit top down or bottom there are many patterns to choose from.
A general knitting step-by-step instruction:
Step 1: Create a gauge swatch
Knitting in the round will alter the appearance of your stitches. Even if you have knitted with the same wool and needle size before, we recommend always creating a round gauge swatch on your circular needles, too. Knit at least six to ten rounds. Bind off all the stitches, wash and dry your swatch before you measure it. Many sock-weight yarns will shrink slightly when washed so getting the gauge swatch washed and blocked gives the correct measurements. Measure your stitches horizontally and vertically for stitch count and row count.
Step 2: Cast on your stitches
Use a stretchy cast-on method such as the long tail cast-on method. You can also use two knitting needles (same or different sizes) as one and then cast stitches. This would definitely give you loose stitches.
Step 3: Join the Stitches in the round
After casting stitches join them in the round. There are many ways to get this done. You can simply slip a stitch to the other needle or keep knitting. Make sure to use stitch markers to indicate the beginning of the round.
Step 4: Knit the Cuff
The cuff of the knitted socks requires a stretchy fabric. A rib stitch pattern (alternating pattern of knit and purl stitches) say k1, p1 or k3, p2, etc. Continue this pattern until 2-3 inches.
Step 5: Knit the Leg
After the cuff pattern you can proceed to knit the rest of the socks with stockinette stitch, or whatever stitch you love for about 7- 10 inches according to the measurements.
Step 5: Knit the Heel
The heel of the socks are knit differently. You need to divide the stitches. Here you can bring in one double-point needle to secure the stitches that you’ll be working on later. There are many ways to knit the heel, the turn of the heel and the gusset. Use your preferred method. Do give your sock a try to check the fit.
Step 6: Knit the Foot
Continue knitting the foot with stockinette stitch or the method you used to knit the leg.
Step 7: Switch to Double-Pointed Needles
When there are very few stitches on the circular needle switch to double-pointed knitting needles. Make decreases till you have the desired foot length and shaping of the toe.
Cut yarn and graft the toe. The Kitchener stitch is used for the smooth finished toe of the sock. Leave a 6-inch tail of yarn that you can thread through a finishing needle.
Knit 1 more sock. Repeat all of the steps to create a matching sock for the pair.
Happy knitting!


Comments
Post a Comment